


 The Cozy Coupe has been around since 1979 and is known for its iconic red and yellow colors — and the kind of creepy eyes slapped on the front. Most of us probably have a memory somewhere of us Fred Flinstone-ing away in a Cozy Coupe or pushing a sibling in one.
Recently, it’s become popular to take these plastic cars and revamp them to be a bit more aesthetically pleasing. My son’s first birthday was fast approaching, and I knew I wanted to make his first gift memorable. So I found myself in Lowe’s Home Improvement packing a cart full of spray paint and drop cloths for my very own Cozy Coupe makeover.
If you’re feeling up to a wildly obnoxious and time-consuming DIY, I’m here to walk you through the Cozy Coupe Makeover.
What’s Needed for a Cozy Coupe Makeover
Materials:
- Little Tikes Cozy Coupe (new or used)
- Rustoleum 2X Paint & Primer Spray Paint in colors of your choice
- Spray Paint Sealer/Clear Coat
- Cardboard/Cloth tarp
- Painter’s Tape
- Custom License Plates (optional)
- 180 to 220-grit sandpaper
- Sponge Brushes (to fix small oopsies/drips)
- Household Painting mask (optional but highly recommended)
- Automotive Chrome Trim
- Acetone to remove any unwanted spray paint
Set Up, Sand, and Clean All the Pieces
I set up in our garage to try and avoid the oppressive Charleston heat, putting down a tarp and cardboard to catch the overspray.
I bought our Cozy Coupe new so the pieces were already apart and just needed to be sanded. I sanded everything I was going to paint, except for the small pieces like the wheel caps.
After sanding, I made sure to thoroughly clean the pieces so the paint could adhere.
Steps for the Painting Process
1. I started with the Blossom White since that was going to be the most time-consuming. Spray from at least eight inches away to avoid drips or pools of paint. If you do get drips, quickly dap it up with the sponge brush and spray again.
I recommend propping the pillar pieces on smaller boxes to keep them from sticking or peeling paint during the drying process. I had the “dashboard” and the rounded front hump of the coupe sprayed white since they would be accents on the finished piece. I also taped off the door and sprayed the top stripe white. (The bottom half would be blue once it had dried and been clear-coated.)
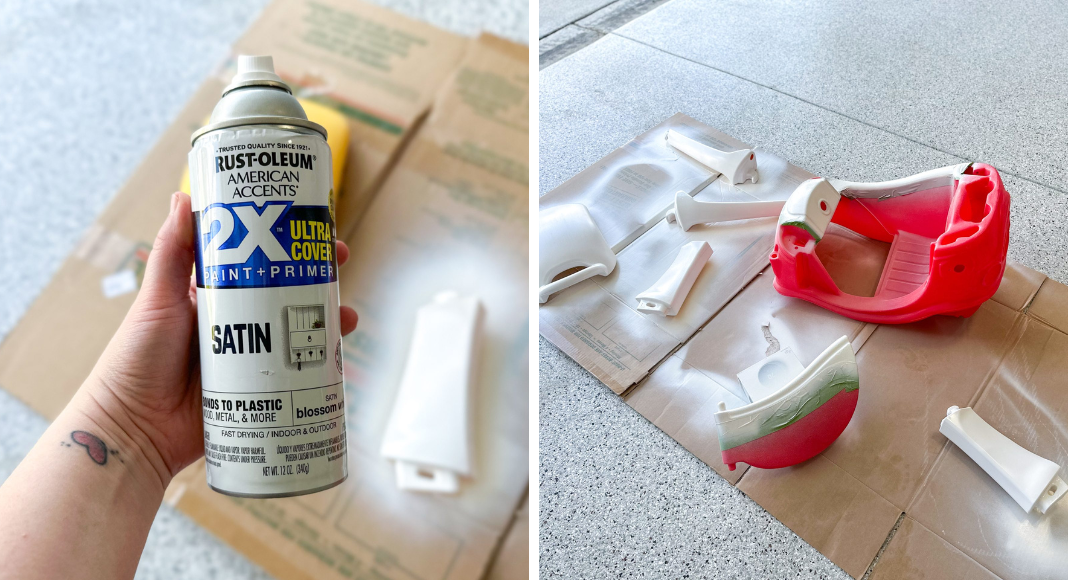
I ended up using way more spray paint than I anticipated because I had a few mishaps. In the end, I believe I used four cans of Blossom White.
Once the white pieces were complete, they got multiple clear coats for protection.
2. Next, it was time to tackle the remaining section of the door and the body. This Vintage Teal color was gorgeous once applied. I’d been on the fence because online it looked way too neon. I sprayed the small parts first and then moved on to the bigger pieces. I had the “dashboard” and the rounded front hump of the coupe taped off since I wanted those to stay white.
I gave the accent pieces a very quick, light spray with the Vintage Teal — two coats of the teal followed up with two coats of the clear coat. These pieces seemed to be a bit more susceptible to the drips/pooling.
I did NOT spray the plastic screws that will hold the two back pillars in place until the car was fully put together. When doing so, I used a large piece of paper to protect the white pillars from any overspray.
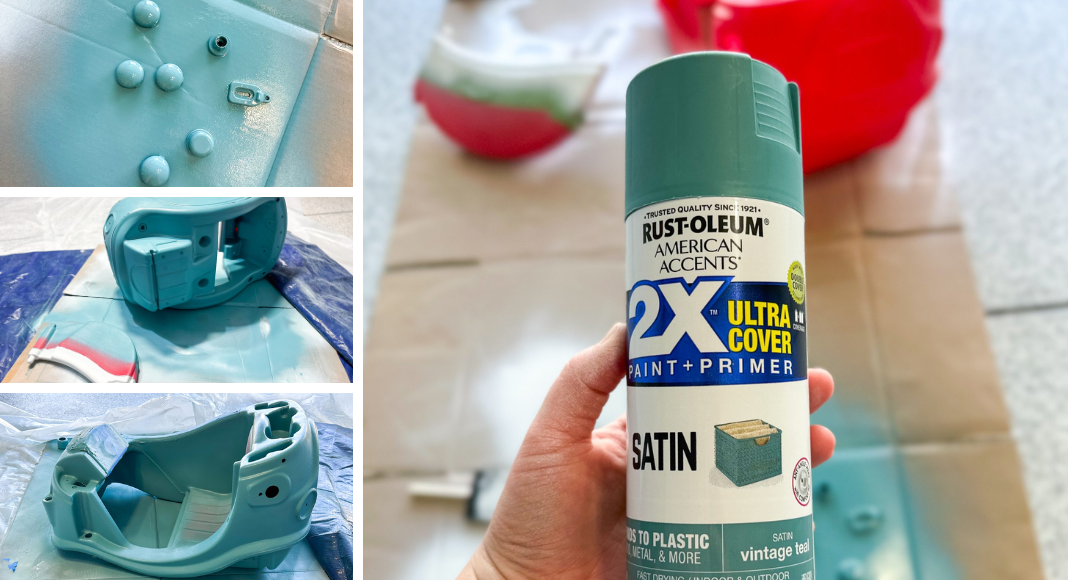 The body of the cozy coupe needed only two full coats of paint but I did find myself having to do a lot of touch-ups where the painted plastic stuck to the cardboard. If you can, avoid doing too many layers in the openings where the pillars and doors will click into place. If you do it in the same order as I did, you will need to wait for the white of the door to fully dry so you can tape it off to do the main color. I used a total of three cans of Vintage Teal.
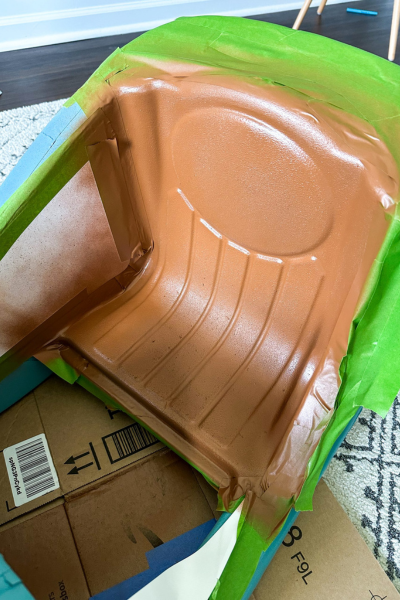
3. The next task was taping off the seat area, after the body had fully dried, and spraying it with the Chestnut Brown Rustoleum. I ended up doing only two coats of brown and two coats of clear. Thankfully none of the body paint peeled off when it came time to remove the paint.
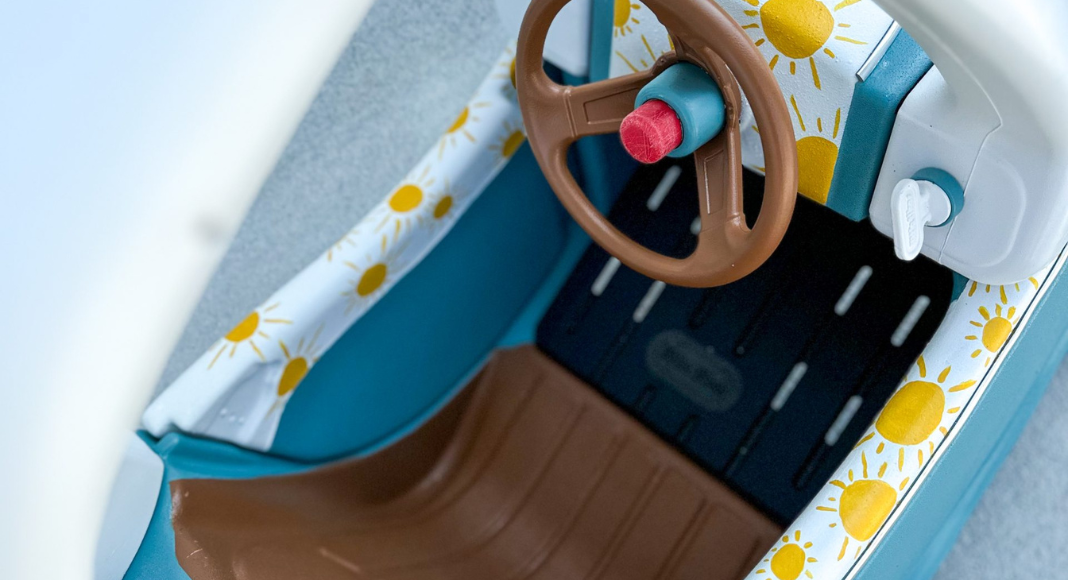
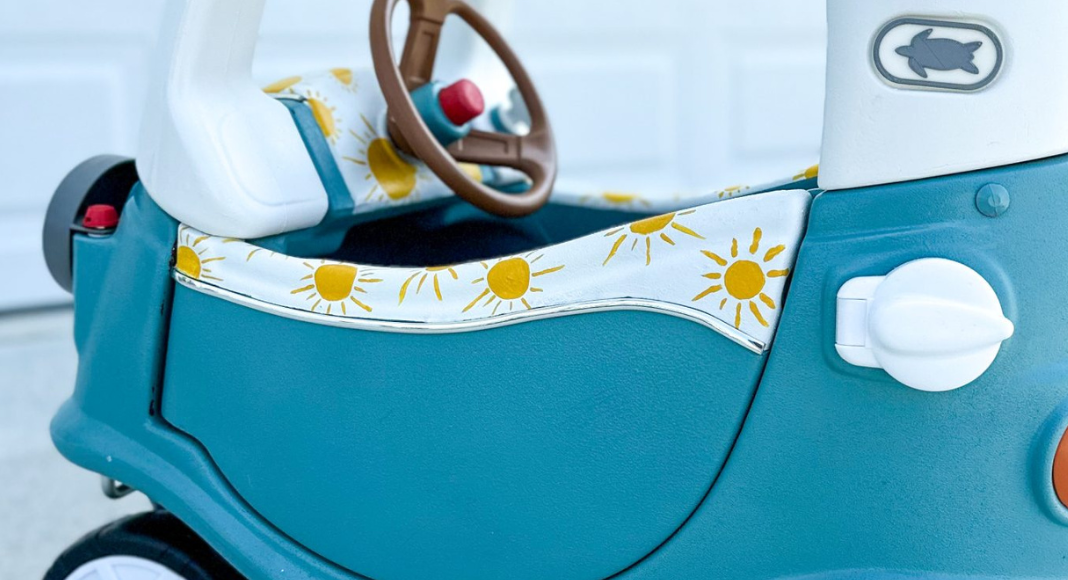
4. When the whole body was dry, I removed the tape and brought it inside. I used yellow acrylic paint to hand-paint some fun little suns along the white sections on the car and the door. This was also clear coated. I needed to do two to three coats since the acrylic paint was a bit thin.
Final Touches on Our Cozy Coupe
I then applied the adhesive chrome trim along the white accent sections. There were two spots on the front chrome trim where it curved, so I had to apply a dab of super glue to get the trim to stay put.
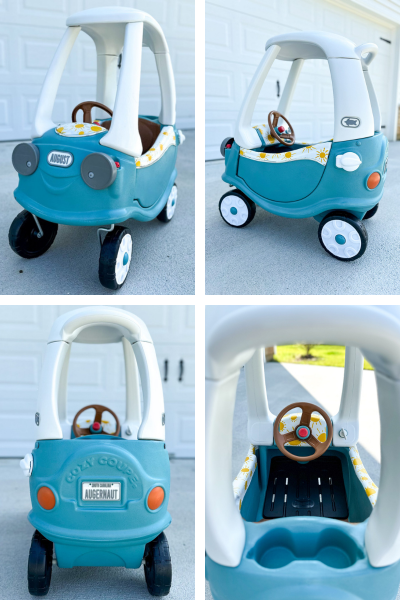
Finally, it was time to attach our custom plates and put the whole thing together. I attached the plates using command strips.
I put most of the Cozy Coupe together but had to leave the wheels and part of the roof to my husband after I started to sweat and get angry. It was IKEA-level annoying to put together. Don’t wait until the last minute for this part. I was not expecting it to be so time-consuming. If you need help, Little Tikes has an assembly video that was kind of helpful.
Do as I Say, Not as I Do: Mistakes Made
- Don’t mix finishes of spray paint. I ran out of Satin White and happened to have Gloss White on hand. Seconds after spraying the pillars, the paint crackled all over and I had to sand them down and re-do them with satin.
- SAND EVERY PIECE THOROUGHLY. Every single thing you plan on spraying, sand it. I didn’t sand the horn for the steering wheel and the paint peeled off almost immediately after I put it together.
- Let each coat dry thoroughly. Don’t rush it.
- Prop pieces up when you can to avoid the paint drying on your cardboard/cloth. I pulled so much cardboard off the dried paint.
- DON’T spray paint the interlocking parts of the pillars and door. Both where the door clicked into the body and the bottoms of the roof pillars had too many layers of spray paint on them. I had to sand them down in order for them to fit back into place.
- If your child might put the horn in their mouth like mine did, don’t paint it. The paint immediately chipped off into his mouth and I about had a heart attack before running to sand off all the paint on the horn.
- Be very gentle putting the Coupe together, especially the door and black floorboard (if using). The pieces rubbing against the body can peel the paint. The door frame of ours is missing a few spots of paint but by the time I noticed, I was over it.
 Have you done a Cozy Coupe Makeover of your own? Let us see your skills! Share in the comments, or tag us on


")
