


I cannot be the only mom who dreams of being a Pinterest mom, but never seems to execute right. After having my daughter, I wanted to get both kids forever Easter baskets. I picture myself still filling them up when they are 30!
I started my search for the perfect one on Etsy. Guess what I found?! All these baskets were SO much money! They were beautiful and completely worth that price, but I thought to myself — I can make these. It will be much more sentimental too, so I was convinced!
Here is my step-by-step process, if you’re interested in also creating these forever Easter baskets for your kids!
How to Create Forever Easter Baskets
Supplies Needed
- Metal bucket — my dad found these for me at Lowes
- Spray primer — this one from Amazon
- Spray sealant — this one from Amazon
- Acrylic Paint — I chose pastel sets from Michaels
- Brushes — I picked up a pack of super cheap ones from Michaels
- Paint Pens
Steps
1. Before I could paint these buckets, I needed to give the paint something to stick to. I used my hand sander and ran it all over them. I wanted them to feel a little scuffed up!
2. Then I went in with my primer and gave them a nice few coats! Looking back, I wish I would have sanded them a little bit more, but fingers crossed they last!
3. Next up was the fun part . . . I got to paint! I started with the bottom layer because I knew I wanted there to be a grassy area on both. I played around a bit here with the green color I had. I mixed it with water and white paint to make it lighter and more grass-like!

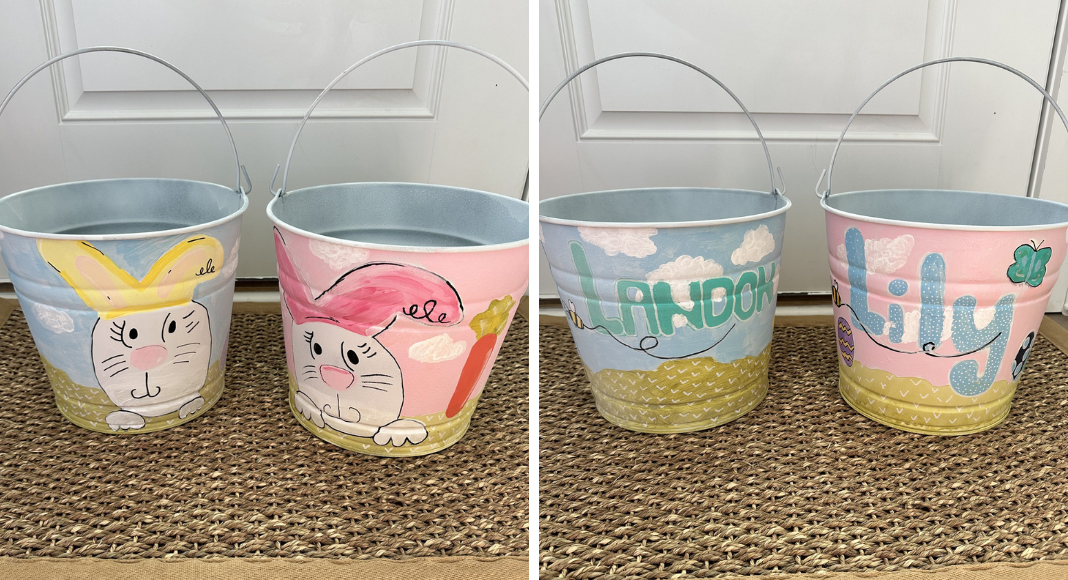
4. Once I had that done, it was time for the bunnies! I used a pencil to draw anything before actually painting it. These don’t look perfect, and I probably painted over a few mistakes 10 times on each bunny, but I think they are adorable!
5. After I finished the bunnies, it was time to do their names! I did my daughter’s first, and after doing hers realized I wanted my son’s letters to look like they were squished together. So I channeled my inner middle school self, and made what I think are pretty good block/bubble letters!
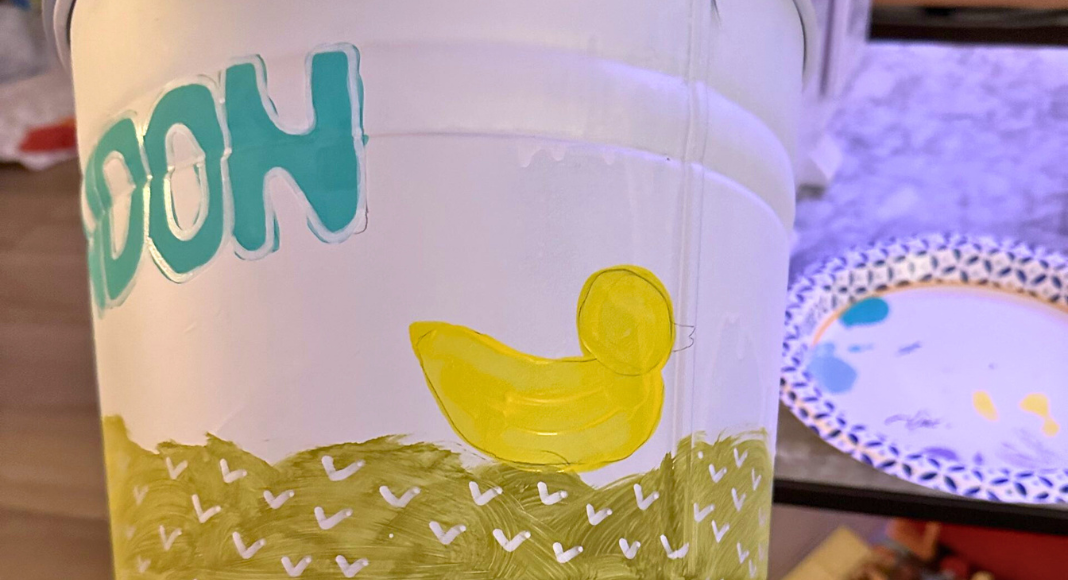
6. At this point, I felt like something was missing. I couldn’t put my finger on it, so I kept looking at examples online. It finally hit me — WHAM — the background needed to be another color! A plain white background wasn’t cutting it, so I decided to go a little rogue. I painted my son’s a light blue (like air/sky color) and I was obsessed! I added little clouds between the letters, bunny, and the cutest little buzzing bee. I felt like his was shaping up so cute! Then I painted my daughter’s background a pink color. I copied the elements I did the first time with the clouds and bees. I love them so much!
7. The last step to finish these up was to spray them with a clear coat of spray paint. Fingers crossed this is enough to keep these babies from chipping or peeling in the future!
Are these Pinterest-perfect buckets? No, but that’s okay!
I poured my heart and love into them, and I hope my babies love them as much as I do! I can’t wait to be filling them up in 10+ years, and remember this specific year and how I was filled with so much excitement/joy while making these.


")
