


As moms, we can sometimes fall into the trap of putting the needs of others before our own. This often happens to me, so I find myself consciously building in self-care time. In celebration of making self-care more of a priority, I’ve rounded up three budget-friendly at-home spa ideas that are easy to fit into a daily mommy routine and hopefully get you in the spring beauty pampering spirit!
3 Budget-Friendly At-Home Spa Ideas
Honey and Egg White Face Mask
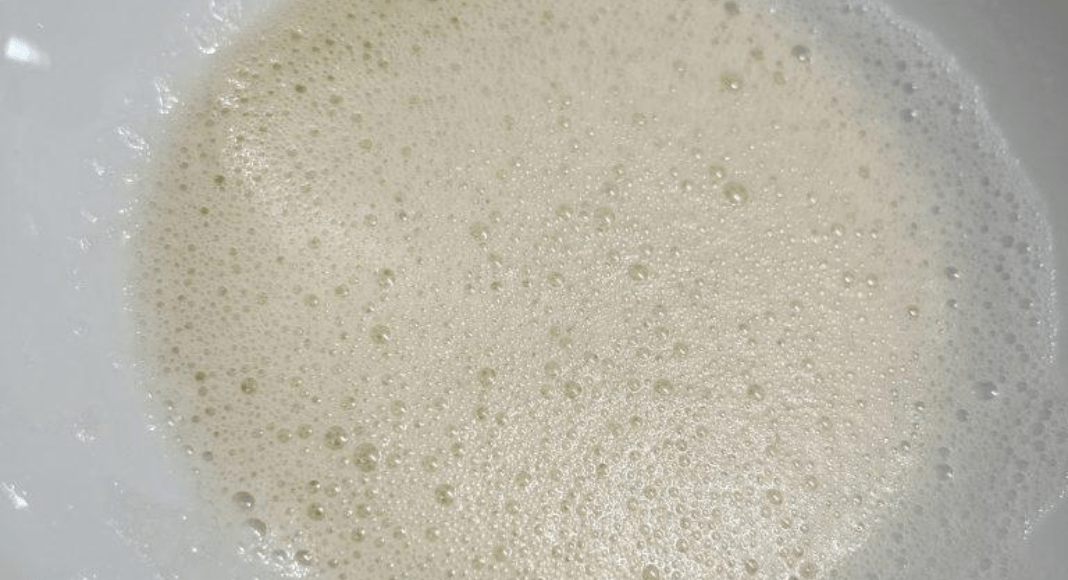
Growing up in Cleveland, Ohio, I remember my Slovakian-American grandmother using egg whites for a quick and easy facial. She’d whip the whites until they started to loosely hold their shape and then applied the concoction all over her face and neck. Us grandkids would get a kick out of peeling the mask off her face after it had hardened, and grandma sure looked fresh-faced with a youthful glow afterward!
Turns out there is something behind the egg-white facial. Egg whites are touted to tighten the skin, unclog and close up pores, and clear up any excess oil. There are skeptics, but this custom has been practiced over the centuries. Add a little honey and/or lemon juice for added antibacterial, moisturizing, and restorative qualities.
*Note: those with known allergies to eggs should avoid this treatment. Always test a small patch of skin for allergic reaction before applying liberally. Be mindful not to ingest any of the egg white mixture or apply it over any open cuts to prevent bacterial infection.
Recipe: One egg (egg whites only), one teaspoon honey, one teaspoon lemon juice (optional)
Directions: Whisk everything together until the mixture becomes a little stiff and more malleable. Apply liberally to a clean face and neck with your fingers, a cotton ball, or a facial brush. I find that a cluster of cotton balls works best to blot the mixture on the skin. Leave on for about 15 minutes to allow the mask to harden. Remove by peeling gently away from the skin. Wash off any residual mask using your normal face care routine.
The verdict: Surprisingly refreshing, my skin felt softer and had more elasticity afterward. I left the mask on for 15 minutes but would have kept it on longer had I had more time.
 Homemade Rose Water Mist
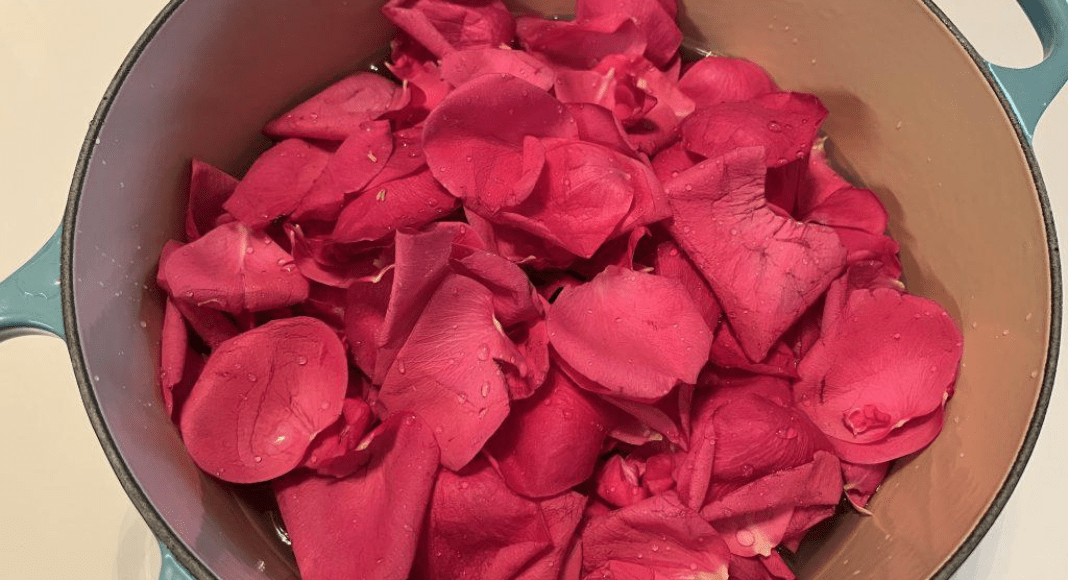
As simple and refreshing as it sounds, homemade rose water mist takes less than 45 minutes to prepare and can add a touch of luxuriousness to your daily beauty rituals. All you need are some rose petals and distilled or filtered water, a large bot to boil them in, a spray bottle, and a funnel, and you can have homemade rose water ready for your misting pleasure. Added bonus, it’s a great way to repurpose roses once they’re on the decline.
Recipe: About 2 cups of fresh rose petals, rinsed; 8 cups of distilled (preferably) water; one large pot to simmer; a strainer; spray bottle or jar
Directions: Wash fresh rose petals in a strainer with cold water. Be sure to remove any impurities. Fill a large pot with 8 cups of water, preferably distilled (I used filtered as I had it readily available but for the purest form, distilled is recommended). Add the rose petals, cover, and bring to a simmer over low to medium heat. Allow the rose petals to simmer for about 30 minutes or until they lose their color. Remove the pot from the burner and let the liquid cool down completely. Strain the rose petals and strain the liquid into a spray bottle or jar using a funnel. Use the mist liberally over your skin and face. It will keep for up to one week refrigerated.
The verdict: I took rose petals from my birthday bouquet and simmered them on the stove. The process was quite easy to do and didn’t take me long at all. The scent was fantastic! I like to spray the mist directly into the air when I get out of the shower in an already steamy bathroom. It adds a freshness and a sweet note of roses to the air. Also, don’t be surprised if the mist takes on the color of the roses. Mine had a pinkish-reddish hue, which was a fun surprise!
 Coconut Oil Hair Mask
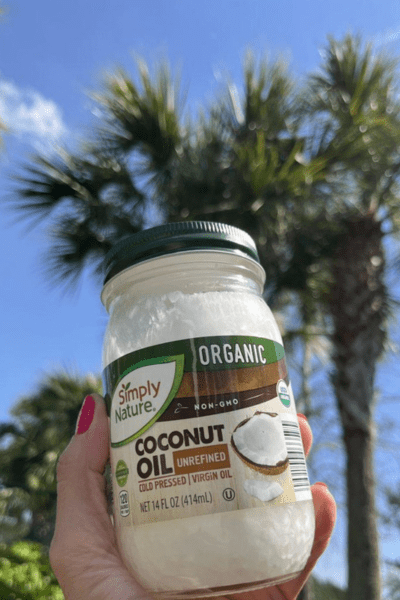
A great hack for our humid climate, the benefits include adding moisture to hair and scalp, de-frizzing, and untangling. Coconut oil also protects hair from damage caused by harmful UV rays. How does it work? According to this Harper’s Bazaar article, the fatty acid, lauric acid, in the makeup of the coconut oil is to thank. All you need is a jar of coconut oil and a towel. If you want to jazz up the mask, consider adding things like egg whites, honey, or apple cider vinegar depending on your goals.
Recipe: For a simple coconut oil hair mask, use unrefined virgin (or extra-virgin) coconut oil straight from the jar. If you’re adding more ingredients to the coconut oil mask, melt the coconut oil first in a saucepan or in the microwave to get it to its liquid state, then add other ingredients.
Directions: If using coconut oil straight from the jar, spoon the hardened oil into the palm of your hand, rub it together to liquefy, and apply liberally throughout your hair. Be sure to give your scalp a good massage, working the product all the way through your strands and paying special attention to the ends. Once hair is completely coated, wrap it in a towel and wait 30 minutes, or, for maximum benefits, sleep in the mask overnight. Just be sure to cover your pillow! Rise off the following day with water and shampoo normally. Your hair may need a few washes before the mask completely washes out. Use the same process if starting with the liquid form.
The verdict: After my first try, I was sold! This one goes down as probably my all-time favorite DIY home spa beauty hack. It’s so easy to do and the end result is gorgeous, shiny, moisturized locks for weeks. I left my mask in overnight and wrapped my hair in a bath towel. It did take a few washes to get all of the coconut oil out of my hair, but the shine made up for it. I’ll definitely be adding this hair mask to my monthly haircare routine.
 Got a favorite springtime beauty hack? Let us know in the comment section below! Stay tuned for our summer edition of easy DIY Home Spa ideas coming soon!


")
